
Welcome to the New York State VendRep System
The VendRep System is a web-based application for the creation, completion, certification, and review of electronic versions of Vendor Responsibility Questionnaires by the vendor, which are available for review by authorized New York State Contracting Entity users.
As a vendor you can:
- Electronically complete, certify and submit your questionnaire
- Notify State contracting entities and users within your organization that a questionnaire has been certified
- Review your contract data and check the status of a contract under review at OSC
VendRep System Online Help contains the instructional guidance and information needed to effectively use the System and complete vendor responsibility tasks that are required when engaging in business with the State of New York for contracting purposes.
System Roles
Users are assigned roles which permit them to perform certain tasks in the VendRep System. Roles within the System are meant to reflect the role a user plays in an organization and only allows the user to complete tasks for which they have the authority.
Roles are initially assigned when the user is created by an Authorizer in OSC Online Services. Thereafter, roles may be added or removed as needed by your entity's Business Authorizer.
Administrator
Creates and maintains Basic Vendor Data in the VendRep System, views questionnaires and contract data.
Certifier
Certifies a completed questionnaire and views their organization's contract data.
Contributor
Enters the vendor’s responses to a questionnaire and views contract data.
Guest
Views vendor’s questionnaire and contract data.
Navigational Guide
Navigation Bar
The navigation bar runs along the left side of every VendRep System page. It provides quick and direct access to the main features of the VendRep System.
Home
Contains System information, News, and access to Vendor Responsibility Questionnaires.
Vendor Summary
Details Basic Vendor Data, lists available and certified questionnaires, Additional Business Entity Identities and Authorized Contacts.
Notification
Identify users to be automatically notified by email when a questionnaire is certified. These can be users from within your organization or a State contracting entity.
View Users
List users in your organization with their assigned VendRep roles.
Contract Data
Displays in progress, approved and non-approved contract transactions submitted to the Comptroller's Office.
General Help
VendRep System Online Help.
Feedback
Submit comments, suggestions and ideas for improvements that will help to continually enhance the VendRep System.
Title Bar
The title bar is displayed along the top of every page.

1. Organization Name
The organization that is currently logged into the system.
2. Breadcrumbs
Shows where the user is in the system and the path taken to get there.
3. Username
Displays the currently logged in user. It also displays the roles assigned to the user when the mouse is hovered over the name.
View My Assigned Roles
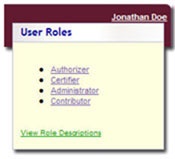
Hover the mouse over your name found in the Title Bar of every System page to view the roles that have been assigned to you.
If you do not have the correct roles assigned to you, contact your organization's Business Authorizer who has the privilege to give other users access to certain applications in OSC Online Services.
Internet Browser
The VendRep System is a secure web-based application that uses JavaScript, cookies and other advance features of Internet Browsers. If any of the required features are disabled, the VendRep System will not function correctly. If you are having trouble viewing the VendRep System, please follow the configuration directions provided below.
VendRep System was tested with the following browsers:
- Microsoft Edge
- Google Chrome
Please ensure that Java and Java Scripting are enabled within your browser settings.
Basic Vendor Data
Completing and Editing Basic Vendor Data
Basic Vendor Data is the preliminary information gathered in the system to identify a vendor and to determine which questionnaire the vendor will respond to. This information gathered also provides information regarding the DBA or other additional identities and provides a contact(s) for the vendor’s organization in regard to answering any questions relative to the Vendor Responsibility Questionnaire.
Only a user with the Administrator role may edit Basic Vendor Data by following the steps below:
Legal Business Entity Information
- Click "Summary" from the Navigation Bar
- Click "Edit" to the right of the Legal Business Entity name
- Make any changes and click "OK"
The Legal Business Entity, TIN (EIN or SSN) and New York State Vendor ID cannot be edited.
Form Information
- Click "Summary" from the Navigation Bar
- Click "Edit" to the right of the Legal Business Entity name
- Make any necessary changes and click "OK"
Additional Business Entity Identities
There are six types of additional Business Entity Identities: DBA, Trade Name, Former Name, Previously Enrolled As, New York State Vendor ID and Other.
Add Business Entity Identity
Click "Vendor Summary" from the Navigation Bar
Click "Edit" to the right of Additional Business Entity Identities
Click "Add"
Complete all required fields and click "OK"
Edit Business Entity Identity
Click "Vendor Summary" from the Navigation Bar
Click "Edit" to the right of Additional Business Entity Identities
Click "Edit" to the right of the Vendor Identity to be edited
Make any necessary changes and click "OK"
View Business Entity Identity
Click "Vendor Summary" from the Navigation Bar
Click "View" to the right of Additional Business Entity Identities
Delete Business Entity Identity
Click "Vendor Summary" from the Navigation Bar
Click "Edit" to the right of Additional Business Entity Identities
Click "Delete"
Confirm identity to be deleted
Vendor identity with a type of "Previously Enrolled As" cannot be deleted.
Authorized Contact
Add Authorized Contact
Click "Vendor Summary" from the Navigation Bar
Click "Edit" to the right of Authorized Contacts
Click "Add"
Complete all required fields and click "OK"
Edit Authorized Contact
Click "Vendor Summary" from the Navigation Bar
Click "Edit" to the right of Authorized Contacts
Click "Edit" to the right of the contact to be edited
Make any necessary changes and click "OK"
Delete Authorized Contact
Click "Vendor Summary" from the Navigation Bar
Click "Edit" to the right of Authorized Contacts
Click "Delete"
Confirm contact to be deleted
Each business entity is required to have at least one Authorized Contact.
Change Legal Business Name
To change your legal business name, follow these instructions:
- Complete a New York State Substitute Form W-9
- Log into the New York State Vendor Self-Service Portal at https://esupplier.sfs.ny.gov
- In the portal, update the legal business name on file exactly as it appears on the Substitute Form W-9
- Upload the Substitute Form W-9 and save/submit
- Once the name change is processed, the primary vendor contact on file will receive an email confirming that the legal business name has been updated in the Statewide Financial System
Once confirmation has been received that the name change has been successful, the following business day log into the VendRep System. Upon logging in, an email will be sent notifying authorized contact(s) of the name change. The new business name will be displayed in the system, and Basic Vendor Data will display the previous name under "Additional Business Entity Identities" with an Identity Type of "Previously Enrolled As."
- For the name change to be recorded in the questionnaire and to be seen by a State contracting entity, the questionnaire must be re-certified. If a questionnaire is already in progress, simply certifying the questionnaire upon completion will update the Vendor’s name in the questionnaire.
Questionnaire
Start New Questionnaire
Only a user with the Contributor role may start and complete a new questionnaire by following the steps below:
- At the Vendor Summary page, click “Start New” under Forms Available
- Click “Continue” on the Confirmation page (not displayed for the initial questionnaire)
- At the Form Overview page, click "Edit" under Actions for the questionnaire section to be completed and/or updated
The organization's initial questionnaire cannot be started in the VendRep System until the Basic Vendor Data has been completed by an Administrator.
A new questionnaire can be started only if there is no other questionnaire in progress. If a newer version of the in-progress questionnaire exists, the Contributor may choose to cancel the questionnaire and start new.
Edit Questionnaire
Only a user with the Contributor role may edit a questionnaire by following the steps below:
- At the Vendor Summary page, click “Edit” under Forms Available
- At the Form Overview page, click “Edit” under Action for the questionnaire section to be completed and/or updated
- Respond to the questions by selecting answers, entering requested information and/or uploading attachments
- Click “Back” or “Next” or “Save & Overview” to save responses
- When all sections are complete, click “Send Certifier Notifications” to send emails to Certifier(s) that the questionnaire is ready to be certified
- Or, if the user also has the Certifier role, the user may proceed to Certify Questionnaire
State contracting entity users cannot access a questionnaire until it has been certified by the vendor.
Vendrep Manual - Attachment Icon Display
The System will display a  next to any section or question that contains an attached file.
A new questionnaire can be started only if there is no other questionnaire in progress. If a newer version of the in progress questionnaire exists, the Contributor may choose to cancel the questionnaire and start new.
Notify Certifiers
When a questionnaire is complete, a Contributor can select one or more Certifier's within their organization to receive an email notification that the questionnaire is ready for certification.
- At the bottom right of the Form Overview page, click the "Send Certifier Notifications" for a list of Certifiers
- Place a checkmark next to each certifier’s name that you wish to notify
- Click "Send"
- Click "Continue" on the Form Complete Confirmation page and an email will be sent to each certifier selected
Certify Questionnaire
Only a user with the Certifier role may certify a questionnaire by following the steps below:
- At the Vendor Summary page, click “Edit” under Forms Available
- At the Form Overview page, review the questionnaire
- Review questionnaire Notification List
- Click “Certify”
- At the Certification page, click “Certify Responses”
State contracting entity users can now access and view the questionnaire that has been certified by the vendor.
Attach File to a Questionnaire
Attachments allow vendors to easily provide an answer by uploading an existing document as a response to a question.
Upload File Attachment
- Select “Attach Document” as a method for providing an answer to a question
- Click the “Choose File” button
- Navigate to the location of the file to be attached, and then click the file to select it
- Click the “Open” button
The page is refreshed, and the attached file name is displayed. The document is not uploaded to the System until “Back”, “Next” or “Return to Overview” is clicked.
Delete File Attachment
- Click the “Delete” button
- Click “OK” on the confirmation message box
The page is refreshed, and the attached file is removed.
Limitations
When providing an answer to a question by attaching a file, please follow the guidelines below:
- File size cannot exceed 2.5 megabytes (MB)
- File name cannot exceed 60 characters in length
- File cannot contain a virus
- Document, spreadsheet, or image file types are allowed (doc, wpd, xls, qpd, pdf, jpeg, etc.)
- Executable, archived or compressed file types are prohibited (exe, dll, com, zip, tar, jar, etc.)
- A maximum of three files can be attached to a question
Templates
Some questions that allow attachments also provide suggested blank templates that can be downloaded, filled out offline and uploaded as the response to the question.
It is very important to keep in mind that after filling out a downloaded template and saving it, that it must be uploaded as an attachment to the question from which it was downloaded.
Review Notifications
Any user within your organization can identify other users to be automatically notified by email when a questionnaire is certified. These users can be from within your organization and/or a State contracting entity.
- At the Form Overview page, click "Review Notifications"
- From the Notification Review page, you may create or modify a list of users to be notified when a questionnaire is certified
Add User
- Click "Add User"
- From the Notification Search page, choose to search for a user by "First Name" or "Last Name"
- Enter the search term in the text box and click "Search"
- Place a checkmark next to each user that you wish to notify
- Click "Add"
User is added and the Notification List is refreshed.
Remove User
- Click "Remove" to the right of the appropriate username
User is removed and the Notification List is refreshed.
Any user from within your organization or a State Contracting Entity can be added to the questionnaire’s Notification List until the questionnaire is certified. Any additions to the Notification List will not carry over to the next questionnaire.
If you wish to make permanent additions to the Notification List, see “Create A Notification Master List”.
View a Questionnaire
A user may view a questionnaire by following the steps below:
- At the Vendor Summary page, click “View” under Forms Active Certified
- At the Form Overview page, click “View” under Action for the questionnaire section to be reviewed
- Or click "View All", found at the bottom of the page, to view the entire questionnaire
Vendrep Manual - Attachment Icon Display
The System will display a next to any section or question that contains an attached file.
Print a Questionnaire
Printing a questionnaire includes Basic Vendor Data, all questions and responses, and the certification page.
- At the Form Overview Page, click “View All”, found at the bottom of the page
- Click “Print”, found at the bottom of the page, to print the questionnaire
If you are experiencing any problems when printing, please see Internet Browser section.
Each attachment must be opened and viewed separately to print.
View Questionnaire History
A user may view the questionnaire history by following the steps below:
- From Vendor Summary Page, click "History", which is located to the far right of the “Forms” section
- Select the form you wish to review and click the form name link
- Click "View" for a specific section or "View All" to review the entire questionnaire
- Click on the History breadcrumb link in the title bar to return to Full History of Form Responses page
- Click "Back" button, found on the page, or click "Summary" on the Navigation Bar to return to Vendor Summary Page
Vendrep Manual - Attachment Icon Display
The System will display a next to any section or question that contains an attached file.
Recertify a Questionnaire
Once a questionnaire is certified, any subsequent changes to the organization's information or to comply with a State contracting entity's request requires a new questionnaire to be started and updated by a Contributor before it can be certified by a Certifier.
- At the Vendor Summary Page, click “Start New” under Forms Available
- Click “Continue” on the Confirmation page
- From the Form Overview page, any section can now be updated with new information by clicking "Edit" under Actions. If a section does not require updating, if can be left as is.
- Respond to the questions by selecting an answer, entering requested information and/or uploading attachments
- Click “Back” or “Next” or “Save & Overview” to save responses
- When all sections are updated and complete, click “Send Certifier Notifications” to send emails to Certifier(s) that the questionnaire is ready to be certified
Where appropriate, the answers from the previously certified questionnaire may be automatically copied.
Notifications
Notify Certifiers
When a questionnaire is complete, a Contributor can select one or more Certifier's within their organization to receive an email notification that the questionnaire is ready for certification.
- At the bottom right of the Form Overview page, click the "Send Certifier Notifications" for a list of Certifiers
- Place a checkmark next to each certifier’s name that you wish to notify
- Click "Send"
- Click "Continue" on the Form Complete Confirmation page and an email will be sent to each certifier selected
Notify a State Contracting Entity of a Certified Questionnaire
An organization can notify State contracting entity users that they have certified a questionnaire by adding them to the Notification Master List or to the questionnaire’s Notification List. The System will send an automated email to the selected user(s) as soon as the organization certifies a questionnaire.
Create A Notification Master List
Your organization can identify users to be automatically notified by email each time a questionnaire is certified. These can be users from within the organization or a State contracting entity. Users on the Notification Master List will receive a notification email each time a questionnaire is certified.
- Click "Notification" from the Navigation Bar
- From the Notification Master List page, you can create or modify a list of users to be notified when a questionnaire is certified
Add User
- Click "Add User".
- From the Notification Search page, choose to search for a user by "First Name" or "Last Name"
- Enter the search term in the text box and click "Search"
- Place a checkmark next to each user that you wish to notify
- Click "Add"
User is added and the Notification List is refreshed.
Remove Users
- Click "Remove" to the right of the appropriate username
User is removed and the Notification List is refreshed.
View My Contract Data
The Contract Data page provides access to summary data about contracts which have been submitted to the State Comptroller's Office. The data includes contract statuses, i.e., in-progress, approved and non-approved by OSC.
- Click "Contract Data" from the Navigation Bar
- Refine search results by selecting a filter term from the dropdown boxes. Any combination may be used.
- Click on “Filter” to view results
- Click on any column header to sort the data by that column
- Close the window when you are finished viewing the data
View My Organization's Users
The View Users page displays all the VendRep users in your organization who have logged in and accepted the VendRep User Agreement.
- Click "View Users" from the Navigation Bar
The users’ names are displayed with their email addresses and their roles. The columns can be sorted by clicking in each column header.
Change My Password
- Click "My Apps" in the upper right corner of any screen, and then select "Online Services Identity and Access Management (ENROLLMENT)"
- On the following screen, click on the drop down next to the user's name at top right of screen in the Title Bar and then select "User Profile"
- Click "Edit" button within Password section
- Enter Current Password
- Enter New Password
- Re-type New Password
- Click "Update"
An email is sent to the user that confirms a change was made to the profile.
Your new password must contain no fewer than eight and no more than 30 characters. It must include one upper case and one lower case character, and one number. It cannot contain a User ID or any special characters.
Questionnaire Instructions
For-Profit
Completion & Certification
The person(s) completing the questionnaire must be knowledgeable about the vendor’s business and operations. An owner or owner’s official representative authorized to legally bind the Reporting Entity must certify the truth of the questionnaire answers.
New York State Vendor Identification Number (Vendor ID)
The Vendor ID is a ten-digit identifier issued by New York State when the vendor is registered on the Statewide Vendor File. This number must now be included on the questionnaire. If the business entity has not obtained a Vendor ID, contact the IT Service Desk at [email protected] or call 866-370-4672.
Definitions
All underlined terms are defined in the “New York State Vendor Responsibility Definitions List”. These terms may not have their ordinary, common or traditional meanings. Each vendor must read the respective definitions for any and all underlined terms. By submitting this questionnaire, the vendor agrees to be bound by the terms as defined in the "New York State Vendor Responsibility Definitions List" existing at the time of certification.
Responses
Every question must be answered fully. Each response must provide all relevant information to appropriately explain the answer. If you have concerns as to the legal requirements behind your answers, please seek clarification from your counsel. However, information regarding a determination or finding made in error which was subsequently corrected or overturned, and/or was withdrawn by the issuing government entity is not required to be identified. Individuals and Sole Proprietors may use a Social Security Number but are encouraged to obtain and use a federal Employer Identification Number (EIN).
Reporting Entity
Each vendor must indicate if the questionnaire is filed on behalf of the entire Legal Business Entity or an Organizational Unit within or operating under the authority of the Legal Business Entity and having the same EIN. Generally, the Organizational Unit option may be appropriate for a vendor that meets the definition of “Reporting Entity” but due to the size and complexity of the Legal Business Entity, is best able to provide the required information for the Organizational Unit, while providing more limited information for other parts of the Legal Business Entity and Associated Entities.
Associated Entity
An Associated Entity is one that owns or controls the Reporting Entity, or any entity owned or controlled by the Reporting Entity. However, the term Associated Entity does not include “sibling organizations” (i.e., entities owned or controlled by a parent company that owns or controls the Reporting Entity), unless such sibling entity has a direct relationship with or impact on the Reporting Entity. Please refer to the Definitions List for the complete definition.
Structure Of the Questionnaire
The questionnaire is organized into eleven sections. Section I is to be completed for the Legal Business Entity. Section II requires the vendor to specify the Reporting Entity for the questionnaire. Section III refers to the individuals of the Reporting Entity, while Sections IV-VIII require information about the Reporting Entity. Section IX pertains to any Associated Entities, with one question about their Officials/Owners. Section X relates to disclosure under the Freedom of Information Law (FOIL). Section XI requires an authorized contact for the questionnaire information.
For Profit Construction (CCA-2)
Completion & Certification
The person(s) completing the questionnaire must be knowledgeable about the vendor’s business and operations. An owner or owner’s official representative authorized to legally bind the Reporting Entity, must certify the truth of the questionnaire answers.
New York State Vendor Identification Number (Vendor ID)
The Vendor ID is a ten-digit identifier issued by New York State when the vendor is registered on the Statewide Vendor File. This number must now be included on the questionnaire. If the business entity has not obtained a Vendor ID, contact the IT Service Desk at [email protected] or call 866-370-4672.
Definitions
All underlined terms are defined in the “New York State Vendor Responsibility Definitions List,” found at http://www.osc.state.ny.us/vendrep/documents/questionnaire/definitions.pdf. These terms may not have their ordinary, common, or traditional meanings. Each vendor must read the respective definitions for any and all underlined terms. By submitting this questionnaire, the vendor agrees to be bound by the terms as defined in the "New York State Vendor Responsibility Definitions List" existing at the time of certification.
Responses
Every question must be answered fully. Each response must provide all relevant information to appropriately explain the answer. If you have concerns as to the legal requirements behind your answers, please seek clarification from your counsel. However, information regarding a determination or finding made in error which was subsequently corrected or overturned, and/or was withdrawn by the issuing government entity, is not required to be identified. Individuals and Sole Proprietors may use a Social Security Number but are encouraged to obtain and use a federal Employer Identification Number (EIN).